Photo Routine
|
Navigation Links |
Purpose / Aim
The purpose of the Photo Routine is to detail the methodology that should be adopted to sufficiently document and record scene and road and vehicular evidence that will allow accident investigators to complete a detailed accident reconstruction and investigation.
Methods
Photographic evidence should be recorded for both the scene and road as well as the accident vehicles. Therefore, the methodology detailed below is divided into Scene and Road as well as Vehicle Photos. Together, these two sections should comprise the required elements to sufficiently detail the accident scene and accident vehicles to allow investigators to conduct an investigation and reconstruction.
The methods outlined within this section should be applied in conjunction with relevant Detailed Methodology sections.
Generally speaking, for all cases when recording visual evidence, it is recommended that investigators use a flash in poor lighting conditions and a tripod where practical.
Scene and Road Photos
Generally many photos should be taken. Photos with lower quality and unnecessary duplicates can be erased afterwards.
Following steps are valid for taking photos of the accident site:
- Overall accident site overview photos.
- Photos of traces on and beside the road.
- Photos of relevant measurements.
- The approach towards the accident for each element.
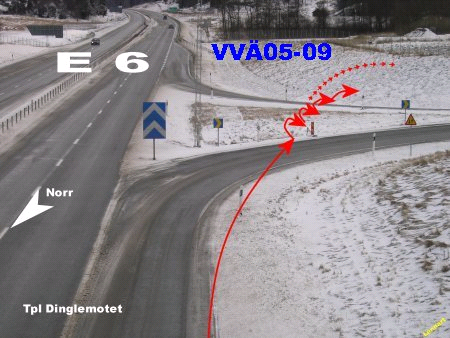
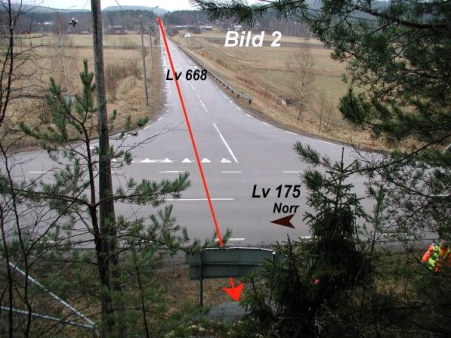
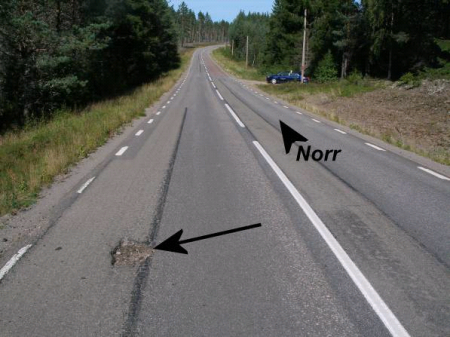
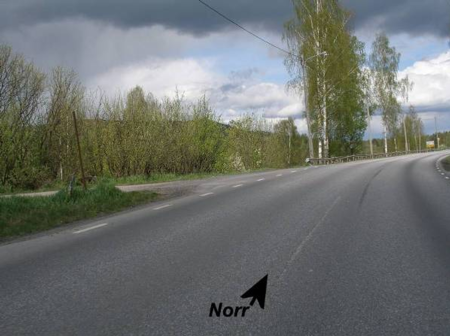
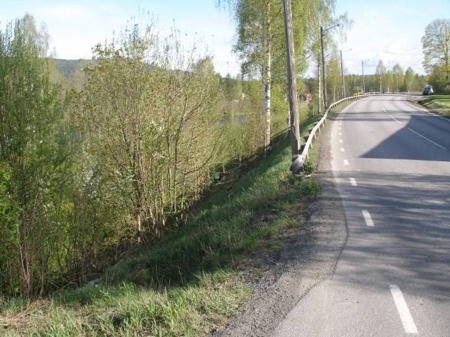
1. Overview Photos
The overview photos should be taken in such a way to include all the major elements of the accident, including: the involved vehicles, the impact area, and the final position of the vehicles. This will hopefully provide investigators with a general description of the accident scene local road infrastructure and the environment.
When overview photos are taken, reference objects like posts, traffic islands and signs together with the placing of the vehicles should be included. These photos can advantageously be taken from a height beside the road to get a good overview of the accident site. Also, ensure to get a photo in the opposite approach direction of the vehicle from a point behind the end position of the vehicle.
The figures below show examples of Overview Photos.
 |
 |
 |
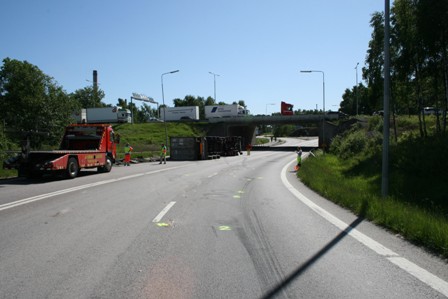 |
Figures 1-4: Overall Accident Scene
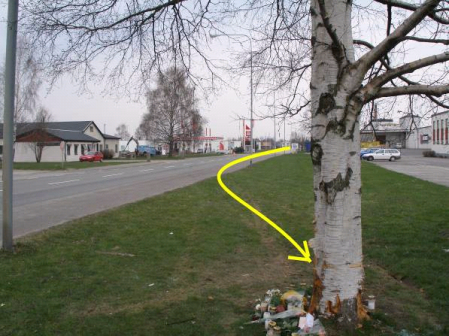
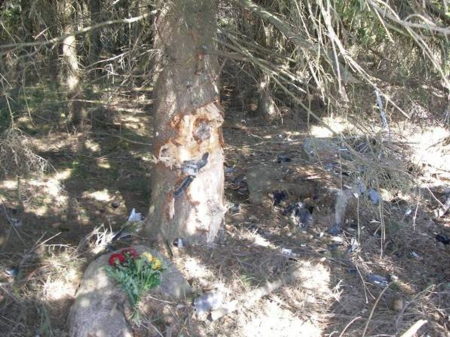
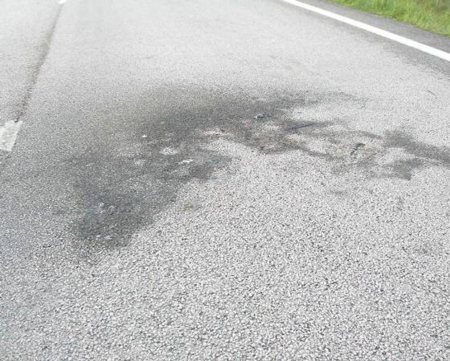
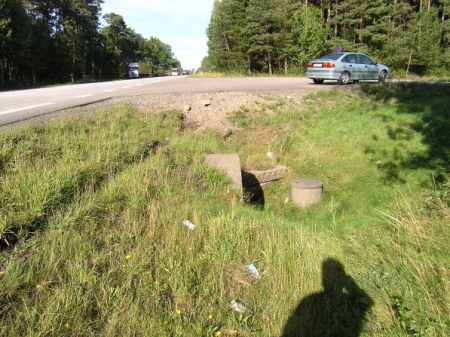
2. Trace Evidence Photos
As stated above, it is important for investigators to prioritize photos of evidence that may disappear soon after the accident. This includes evidence such as: glass splinters, detached vehicle parts, vehicular fluid spillage, road user biological traces, debris, etc. These items should take priority over evidence that can be recorded after the trace evidence photos.
It is also noted that to have a better understanding of the size of the evidential objects, it is recommended to include a measure tape or reference object in the photo.
The figures below show examples of Trace Evidence.
 |
 |
 |
 |
Figures 5-8: Trace Evidence
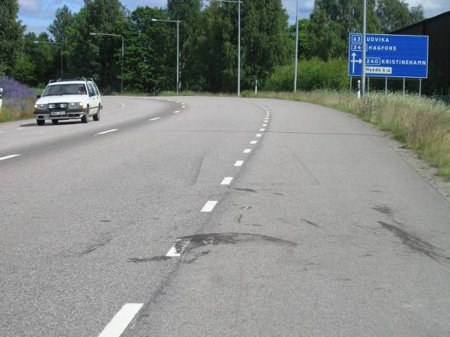
3. Measurement Photos
Measurement photos can be made of barriers, road markings, trace depth, support strip and ditches. These photos are of special importance if it is judged that there are defects that might have influenced the cause of the accident or the course of events. To get a better understanding of the size of the objects it could be good to include a measure tape or reference object in the photo.
The figures below show examples of Measurement Photos.
 |
 |
 |
 |
Figures 9-12: Measurement Photos
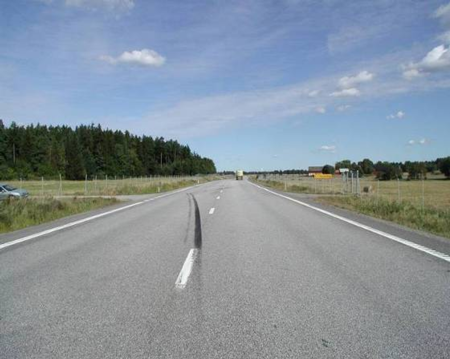
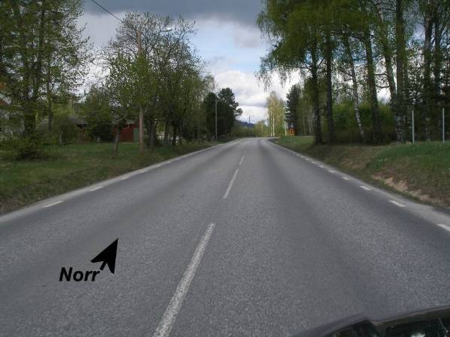
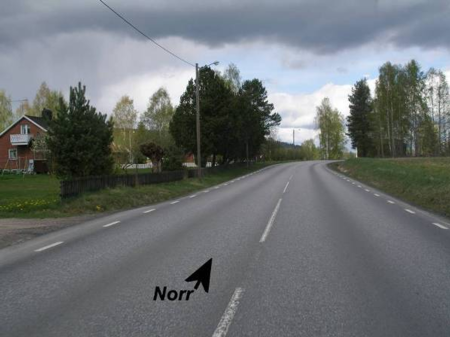
4. Accident Approach Photos
The purpose of documenting the approach of the vehicle towards the accident site is to determine if the road environment contributed the causation of the accident. In rural areas, the documentation should commence at least 300m before the accident site and in urban areas at least 50m. These photos are preferably taken from inside the investigation vehicle at the height of the eyes of the accident driver. If this is not possible, the photos can be taken from the road side. A complement to the photos can be made through a video recording of the approach.
 |
 |
 |
 |
 |
Figures 13-17: Approach Photos
Vehicle Photos
Generally many photos should be taken. Photos with lower quality and unnecessary duplicates can be erased afterwards.
The following steps should be taken when recording car and heavy vehicle photos:
- Exterior photos
- Interior photos
- Detail photos of exterior and interior
As there is no interior for Powered Two Wheelers (PTW), the photo routine will differ for inspections of this type. The methodology specific to the PTW photo routine is detailed here.
Car
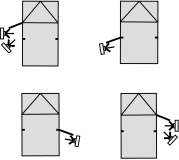
1. Car Exterior Photos
Exterior car photos should be recorded from eight angles around the car (as shown in the figures below). To ease the comprehension for later viewing of the photos it is best if the photos are taken in the same order for every car. If possible start with a photo of the front of the car and continue around the car in a counter clockwise manner. If this for some reason is not done properly the investigator can rearrange/rename the photos later.
An overall understanding of the car exterior should be determined by following this method of recording the car exterior. This can be of service when determining the placement of detailed photos.
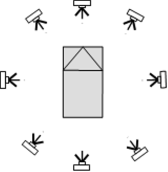
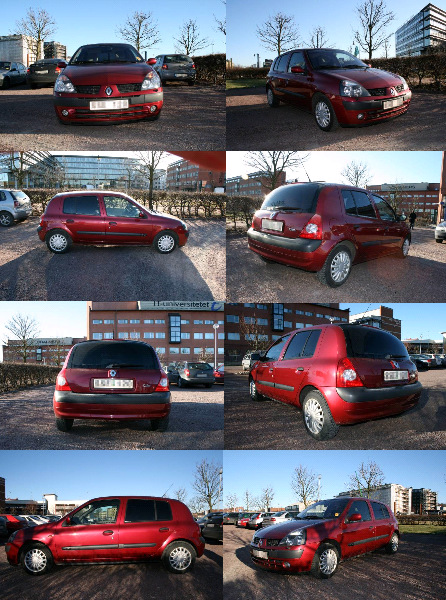
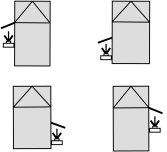
Figure 18-19: Exterior car photo angles
If possible, attempt to record a photo of the roof (as shown in the figure below).

Figure 20: Car roof photo
In some cases, the car roof may have been removed by accident rescuers when freeing trapped occupants. Photos should be taken without the roof (in the state found), followed by photos taken in the same manner (from the eight recommended angles - as above) with the roof replaced. Investigators should ask the wrecker to replace the roof and should not attempt to replace it themselves.
Please see the figure below for a sample of photos showing the removed and replaced roof.
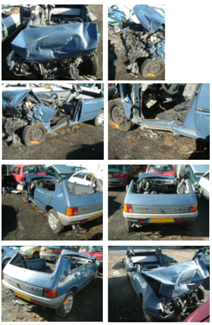
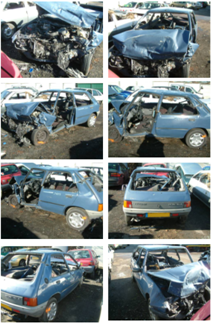
Figure 21: Removed and replaced car roof photos
2. Car Interior Photos
Interior car photos should be recorded from two angles in the front seat and one in the rear seat (where applicable) for both driver and passenger sides of the car. It is important that the opposing door is closed when taking the photo and that the front and passenger seats, area around the door opening, a part of the ceiling and the door side can be seen (as shown in the figures below). The second front seat angle attempts to record the leg space and where applicable, the pedal placement.
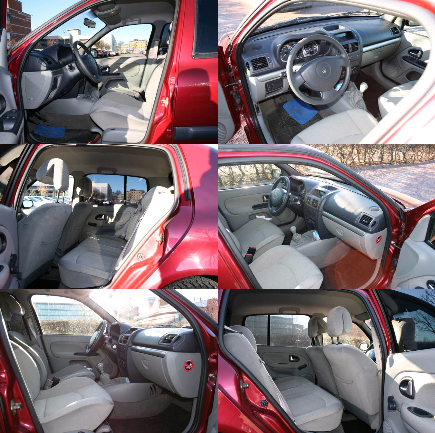
 |  |
Figures 21-24: Car interior photos
3. Car Detail Photos
Car detail photos should show any relevant areas of the vehicle that are helpful during the overall investigation that may not have been adequately recorded in other exterior and interior photos.
These photos can contain detail of the engine compartment as well as any relevant deformations, impacts, airbags, child restraints, safety systems, etc.
The detail photos may also record any evidence of biological traces which may reveal information regarding the mechanism of injury (e.g. blood traces on the steering wheel resulting from injury caused through contact between the road user and the steering wheel).
It is sometimes useful to include a ruler or coin within the detail photos to be able to determine the scale of the object being recorded.
As shown below, the car engine compartment detail photos should be recorded as they can be valuable in the overall investigation.
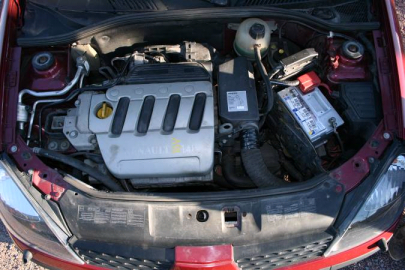
Figure 25: Car engine compartment
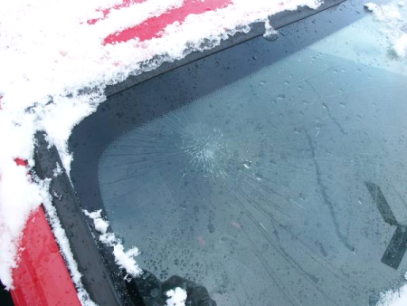
The figures below show details of relevant damages sustained during an accident.
 |
 |
 |
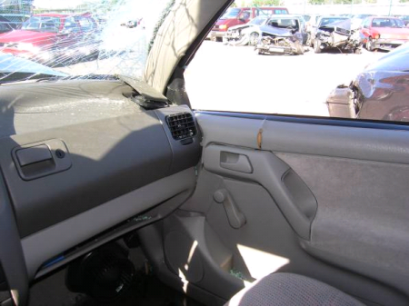 |
Figures 26-29: Relevant car damage detail photos
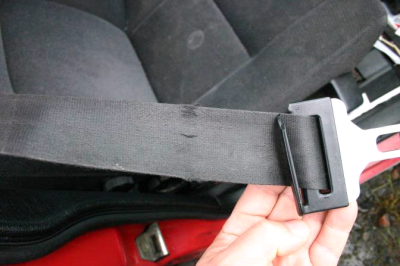
Recording visual evidence regarding the car seatbelts is a key component of the interior photo routine and overall vehicle inspection. As shown below, damage such as friction marks on the seatbelt can indicate that the seatbelt was in use during the accident.
Furthermore, the seatbelt buckle may also reveal whether the seatbelt was worn during the accident, evident from abrasion marks left on the buckle due to the collision.
 |
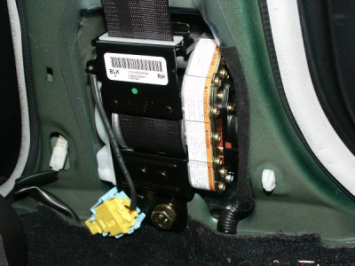 |
Figure 27-28: Seatbelt detail photos (note the damage to the belt in Figure 27)
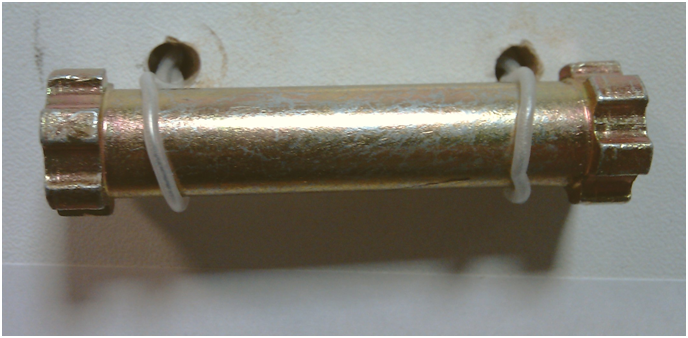
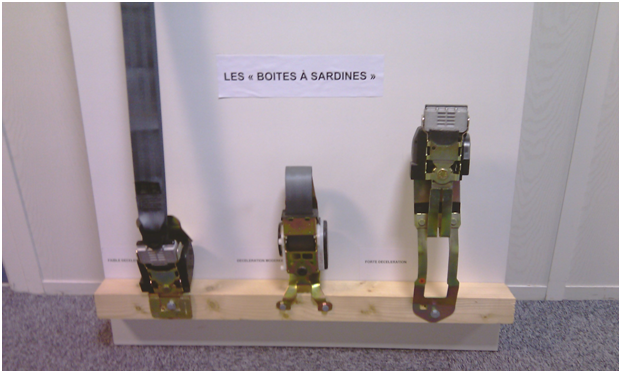
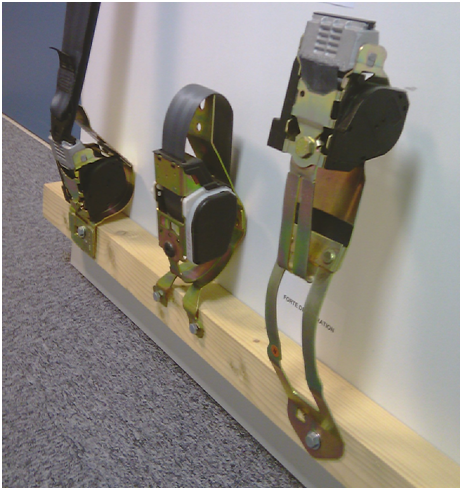
Another indication of whether the road user was wearing their seatbelt at the time of the accident is through inspection of the load limiter. The load limiter is a part of the seatbelt that is intended to limit the restraint forces applied to the occupants thorax during a collision.
The load limiter is often located at the base of the seatbelt where it coils. Examples of load limiters are shown in the figures below.
 |
 |
 |
Figures 29-31: Load limiters
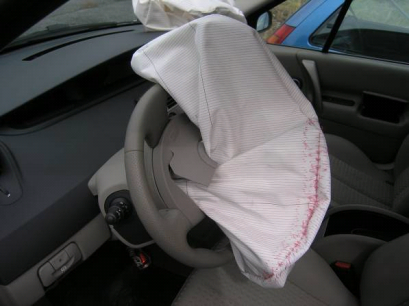
Airbag photos (as shown below) can be useful in revealing mechanisms of injury.
 |
 |
Figures 32-33: Airbag detail photos
Child restraint systems should be examined and detailed in the photo routine (as shown in the figure below).
 |
Figure 34: Child restraint detail photo
The vehicle load may also have contributed to the accident and/or the level of injury sustained by the occupants of the accident vehicle. Photographic evidence of the vehicle load should be recorded (as shown in the figure below).
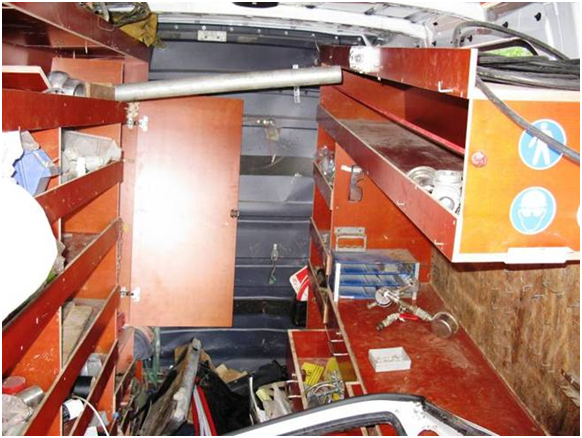 |
Figure 35: Vehicle load
Truck
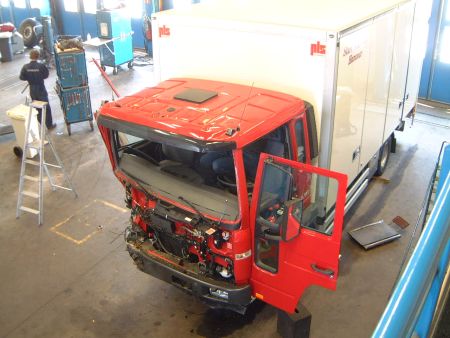
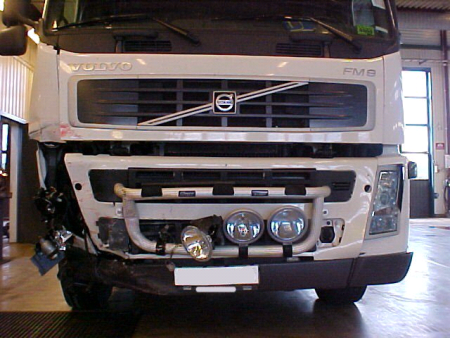
1. Truck Exterior Photos
Exterior truck photos should be recorded from eight angles around the truck (as shown in the figure below).
An overall understanding of the truck exterior should be determined by following this method of recording the truck exterior. This can be of service when determining the placement of detail photos.
In many cases, these photos can be difficult to record as there is often limited space available. Investigators should attempt to record these photos as accurately as possible. Also, the trailer is often removed and photos of the trailer may be required to be recorded separately.
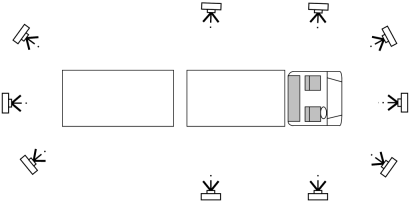
Figure 35: Truck exterior photo angles
Examples of exterior truck photos are shown in the figures below.
 |
 |
 |
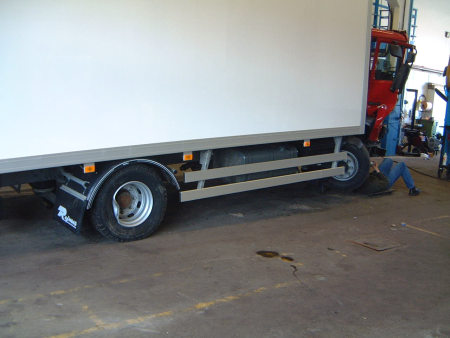 |
Figure 36-39: Truck exterior photos
2. Truck Interior Photos
Truck interior photos should be recorded with at least two of each recorded from the driver and passenger side. It is important that the photos capture the driver or passenger seat, the area around the door opening and the foot well.
The photo from an angle behind the seat(looking towards the windscreen) is preferably taken from inside the cabin and is supposed to give an overview of the driver side seat, instruments and instrument panel.
Truck inerior photos are also important if the protection systems of the driver will be analysed and also for the pre-crash analysis. The photos should give an overview of the driver seat, communication equipment, logistic systems, or any additional equipment used.
See the figures below for the recommended photo angles and example photos

Figure 40: Truck interior photo angles
 |  |
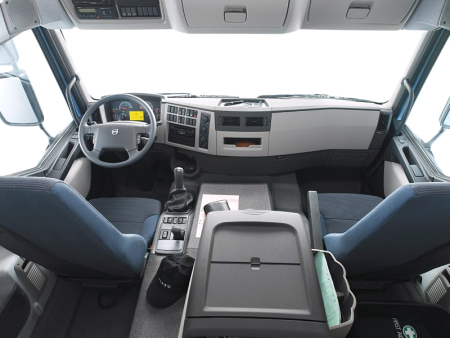
Figures 41-43: Truck interior photos
Photographs of the truck load should also be recorded. The type of load, arrangement, sercurement method and general estimate of the load weight can sometimes be determined from photos of the load. Furthermore, a loss of load should also be documented and can reveal accident causation methods. The truck load photos can be vital during the overall investigation.
Examples of truck load photos are shown below.

Figure 44: Truck load photos
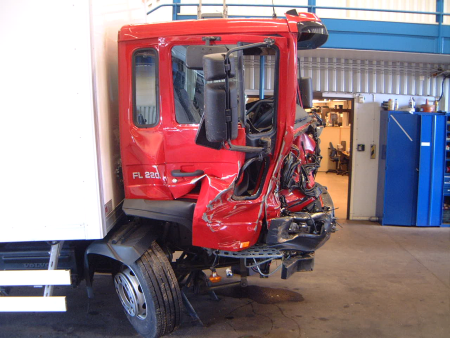
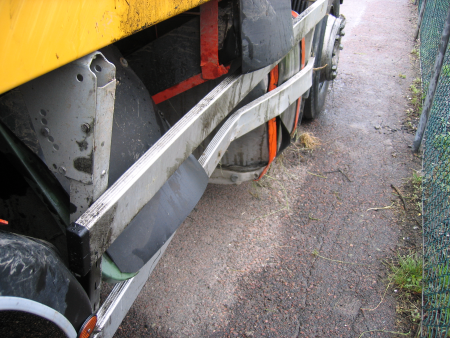
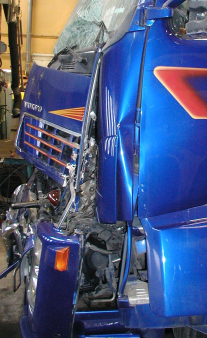
3. Truck Detail Photos
Truck detail photos should show any relevant areas of the vehicle that are helpful during the overall investigation that may not have been adequately recorded in other exterior and interior photos.
These photos can contain detail of the engine compartment as well as any relevant deformations, impacts, airbags, safety systems, etc.
The detail photos may also record any evidence of biological traces which may reveal information regarding the mechanism of injury (e.g. blood traces on the steering wheel resulting from injury caused through contact between the road user and the steering wheel).
It is sometimes useful to include a ruler or coin within the detail photos to be able to determine the scale of the object being recorded.
The figure below shows some recommended (but not an exhaustive list) truck detail photo angles.

Figure 45: Some recommended truck detail photo angles
The figures below show examples of detail photos for a deformation on the Frontal Underrun Protection from an collision with a car, and also Side and Rear Underrun Protection deformation detail photos.
 |
 |
Figures 46-47: Frontal Underrun Protection deformation detail photos
 |
 |
Figures 48-49: Rear and Side Underrun Protection deformation detail photos
In the case of the cabin displacement in relation to the chassis frame, this should be documented within the detail photos of the cabin attachment and photos from the front and side should also be recorded.
Examples of cabin displacement photos in a rear end accident at the rear of a trailer are shown in the figures below.
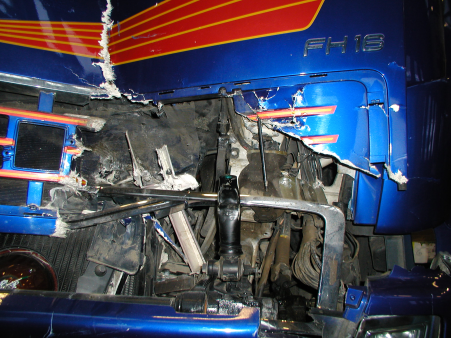 |  |
Figures 50-51: Cabin displacement detail photos
Exterior detail photos of all mirrors of the vehicle should be recorded. If possible, photos of the mirrors from the driver seat angle should also be recorded.
The figures below show some common truck mirror locations.
 | 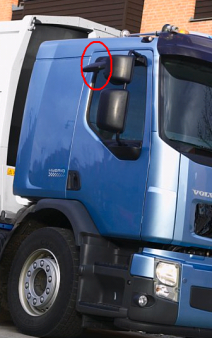 |
Figures 52-53: Common truck mirror locations
The figures below show examples of airbag and interior observation detail photos.
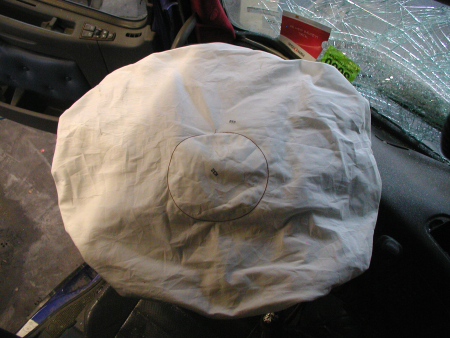 |
Figure 54: Truck airbag photo
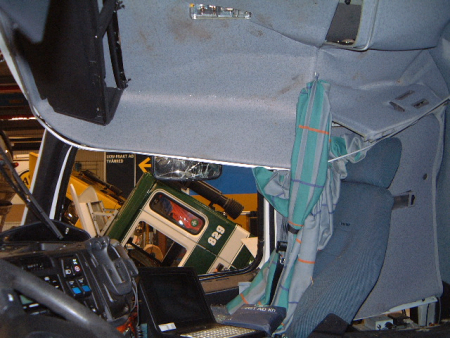 |
Figure 55: Interior observations
Powered Two Wheeler
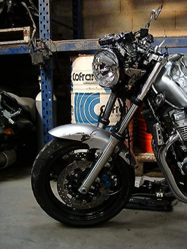
1. Powered Two Wheeler Exterior Photos
Exterior Powered Two Wheeler (PTW) photos should be recorded to give an overview of the PTW itself.
An overall understanding of the PTW exterior should be determineable from these photos. This can be of service when determining the placement of detail photos.
The figure below show examples of PTW exterior photos.
 |
 |
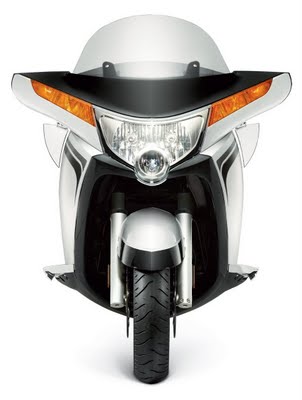 |
Figure 56: PTW exterior photos
2. Powered Two Wheeler Detail Photos
PTW detail photos should show any relevant areas of the vehicle that are helpful during the overall investigation that may not have been adequately recorded in other exterior photos.
These photos can contain detail of any relevant deformations, impacts, airbags, safety systems, etc.
The detail photos may also record any evidence of biological traces which may reveal information regarding the mechanism of injury (e.g. blood traces resulting from injury).
It is sometimes useful to include a ruler or coin within the detail photos to be able to determine the scale of the object being recorded.
Special consideration should be given to any deformations and/or marks as they can reveal much in regards to the kinematics and overall understanding of the accident event.
See the figures below for example deformation detail photos.
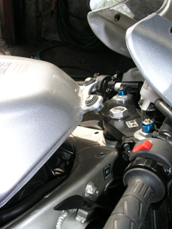
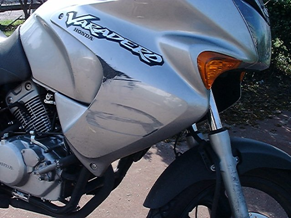
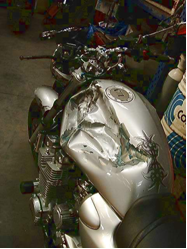
Figures 57-60: Typical PTW side body, gas tank and front forks damage
PTW braking systems differ significantly from car systems and require special consideration.
The brakes (both front and rear) should be recorded through photographic evidence.
See the figures below for example PTW braking systems.
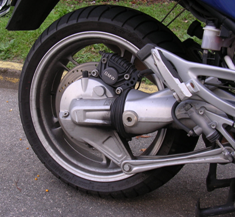
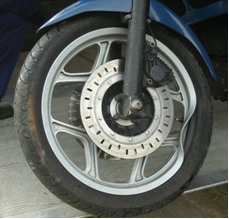
Figures 61-62: Front and rear PTW brake system
The PTW thread depth is relevant to the investigation and photographs should record the level of tread on the tyres.
See the figures below for example tread depth photos.
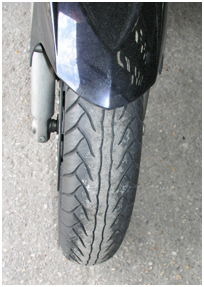
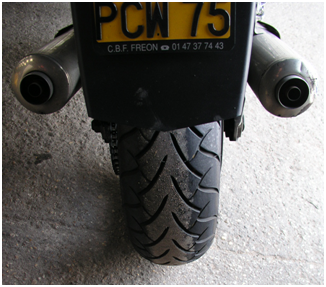
Figures 63-64: PTW Tread depth
PTW road users usually wear Personal Protective Equipment (PPE) that differs from standard vehicle road users. This can include:
- Helmet
- Eyeglasses
- Jacket
- Gloves
- Pants
- Shin Guards
- Boots
All such equipment attempts to provide additional protection and visibility to the PTW road user and should be considered in the inspection.
The PTW protective equipment should be inspected for any damage and/or marks as this can reveal much in regards to the kinematics and overall understanding of the accident event.
Detailed photographs of the helmet (including the fastening mechanism) and all other protective equipment should be made.
See the below figures for example photos of PTW PPE.
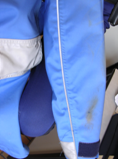
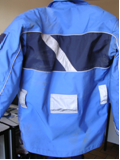

Figures 9-11: PTW Jacket
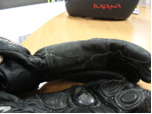
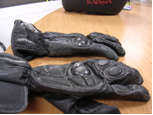
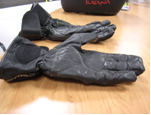
Figures 12-14: PTW Gloves
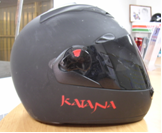
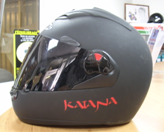
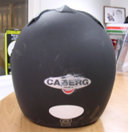
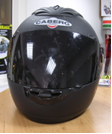
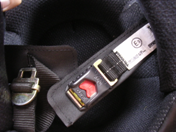
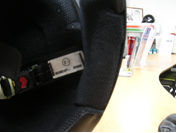
Figures 15-20: PTW Helmet (note the fastener detail)

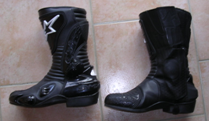
Figures 21-22: PTW Boots
Bus
1. Bus Exterior Photos
Exterior bus photos should be recorded from eight angles around the bus %(as shown in the figure below)%.
An overall understanding of the bus exterior should be determined by following this method of recording the bus exterior. This can be of service when determining the placement of detail photos.
In many cases, these photos can be difficult to record as there is often limited space available. Investigators should attempt to record these photos as accurately as possible.
2. Bus Interior Photos
Interior bus photos should show the overall layout of the passanger seats, the main aisles, location of doors and driver area.
3. Bus Detail Photos
Bus detail photos should show any relevant areas of the vehicle that are helpful during the overall investigation that may not have been adequately recorded in other exterior and interior photos.
These photos can contain detail of the engine compartment as well as any relevant deformations, impacts, airbags, safety systems, etc.
The detail photos may also record any evidence of biological traces which may reveal information regarding the mechanism of injury (e.g. blood traces on the steering wheel resulting from injury caused through contact between the road user and the steering wheel).
It is sometimes useful to include a ruler or coin within the detail photos to be able to determine the scale of the object being recorded.
Guidelines for Unidentification
After returning to the office, all photos should be sorted and all redundant photos deleted. The remaining photos will be unidentified. The recommended method is to do so digitally, by editing the photos in a photo editing program (e.g. Adobe Photoshop, Paint Shop Pro, etc.) where selected parts can be pixelated in convenient fashion. What is important is that all identifiable elements such as faces, registration numbers and identifiable stickers are removed.
Adobe Photoshop Guidelines
- Open the photo to be edited in the program.
- Choose the “Lasso Tool” in the Standard Toolbar.
- Mark the element to be removed.
- Mark “Filter” -> “Mosaik” in the menu field.
- Choose appropriate “Cell size”.
- Press “Ok”.
- Save the photo.
Paint Shop Pro Guidelines
- Open the photo to be edited in the program.
- Choose “Selection” in the toolbar.
- Mark the element to be removed.
- Mark “Flood Fill”.
- Click inside the marked area.
- Save the photo.
Equipment
Please refer to the Scene and Road Equipment List for the Photo Routine equipment list.
Arrangements
Review the above methodology to ensure that investigators have a good understanding of it before arriving on scene.