Scene Measurements
|
Navigation Links |
Purpose / Aim
The purpose of making scene measurements is to establish a better understanding of the positioning of relevant accident elements and to enable an accurate sketch to be created. The scene measurements provide valuable data to accident investigators that give a better overall understanding of the accident and aid in the reconstruction process.
Methods
There are numerous methods available to accident investigators for making scene measurements. Each method system have unique advantages and disadvantages that the investigators should consider when applying a particular measurement system.
The methodology below details the following measurement techniques:
- Orthogonal Coordinate Grid System
- Triangulation
- Path Coordinate System
- Photogrammetry
There are several alternate measurement techniques available using highly sophisticated equipment such as laser scanners, total stations, theodolites and differential GPS. These systems require an experienced user but can save time while collecting high quality data. However, due to the cost they are unlikely to be used for most accident scene investigations and therefore further details will not be described.
Orthogonal Coordinate Grid System
A simple method of measuring the accident scene is to record the measurements on an orthogonal coordinate grid by first finding a reference point and then defining a (straight) reference line which will represent the X-axis. The Y-axis measurements are then measured perpendicularly to the reference line.
Premises
- One or two persons available
- Straight and simple road layout is present
Steps
1. Establish Reference Point
Measurements of the accident scene can be facilitated by first establishing a fixed reference point. The point of reference must be fixed and can be street lamps, fixed posts, building wall corners, etc.
2. Define Reference Line (X-axis)
After selecting an initial reference point, an axis can be established from the reference point. This axis will form the reference base that all other points of interest will be measured against.
3. Accident Site Elements
After establishing the X-axis, all additional points of interest can given as measured distances in the Y direction from the defined X-axis (note: for long distances (>3m), it is recommended to use a measurement wheel and for short distances (<=3m), a measurement tape (2 persons) can be used).
Pros
- Relatively fast and simple measurement method
Cons
- Requires a simple road layout
Triangulation
With this procedure, two points of reference are selected, where the distance between these points is known. The distance to each point of interest should then be measured from both the two reference points.
The angle between the reference base line and the line to the point of interest should not be obtuse nor too acute. If the distance between reference point A and point B is too long and interest point C is too close to the connecting line AB, then there won’t be an intersection and point C cannot be found with this method. An acute angle and inaccurate measurement causes an offset of point C.
Premises
- Two persons available
- Complex measurement on straight road layout
Steps
1. Establish Reference Points
Measurements of the accident scene can be facilitated by first establishing a fixed reference points. These points of reference must be fixed and can be street lamps, fixed posts, building wall corners, etc. At least two points of reference are required to make accurate measurements. These two reference points will act as base points to which all additional points of interest are related to.
2. Determine Distance between Reference Points
After defining the reference points, the distance between the two should be measured.
3. Accident Site Elements
After establishing the reference points and determining the separating distance, the location of various evidential elements of interest can be determined. All relevant accident elements (i.e. accident vehicles, collision objects, transient evidence, traces, debris, etc.) should be measured in relation to the original reference points.
The angles between the reference points and the point of interest are used to determine the position of the point of interest in relation to the reference points (see the figure below).
Each point of interest should also be numbered to enable accurate record keeping and identification of each element.
An example of measurements created through triangulation is shown in the figure below.
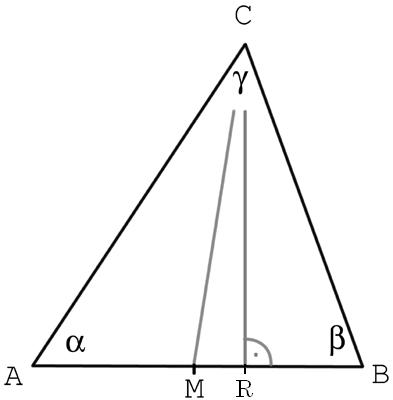
Figure 1: Triangulation measurements
Pros
- Very accurate method for measuring as long as the point of interest is within a suitable area
Cons
- Takes more time than other methods
- Two persons required for measuring
- Low level of accuracy for obtuse and acute angles
Triangulation with Moving Reference Points
If the accident site is relatively large or complex, it can be divided into a network of triangles. These triangles can be measured according to the same principles as stated in the above triangulation method. The measured points are then used as reference points to measure the next unknown point until all unknowns have been accounted for.
Premises
- Two persons available
- Complex road layout is present with a relatively large area.
Steps
Same as above triangulation,but with multiple triangles.
Pros
- Very accurate measurement method
Cons
- Time consuming
- Two persons required for measurements
Path Coordinate System
A path coordinate system is a measurement method where the x-axis is set to follow a path (e.g. the road edge) and the y-axis values are measured perpendicular to the x-axis. This, however, requires that the path itself is well defined.
Premises
- One or two persons available
- Path can easily described
Steps
1. Establish Reference Point
Measurements of the accident scene can be facilitated by first establishing a fixed reference point. The point of reference must be fixed and can be street lamps, fixed posts, building wall corners, etc.
2. Define Reference Line (X-axis)
After selecting an initial reference point, an axis can be established from the reference point. This axis will form the reference base that all other points of interest will be measured against. As stated above, the X-axis is usally chosen to follow the road path.
3. Accident Site Elements
After establishing the X-axis, all additional points of interest can given as the perpendicularly measured distances in the Y direction from the defined X-axis (note: for long distances (>3m), it is recommended to use a measurement wheel and for short distances (<=3m), a measurement tape (2 persons) can be used).
Pros
- Very simple method for measuring of complex road path
Cons
- Long chords required for accurate measurements
- Perpendicular measurements may be difficult
Photogrammetry
Photogrammetry is the practise of producing real world measurements from photographs. There are several photogrammetric techniques available. 2-D photogrammetry methods require only one photograph and can provide adequate accuracy for nominally flat surfaces. Even when no measurements have been taken at the time of an accident, it is possible to obtain adequate dimensional data to rectify photographs by going to the scene and taking measurements of painted lines or other long-lasting roadway features that appear in the original photographs.
Premises
- One or two persons available
- Measurement of the reference distances only
Steps
1. Define reference points
Measurements of the accident scene can be facilitated by first establishing a fixed reference points. These points of reference must be fixed and can be street lamps, fixed posts, building wall corners, etc. At least two points of reference are required to make accurate measurements. These two reference points will act as base points to which all additional points of interest are related to.
2. Determine Distance between Reference Points
After defining the reference points, the distance between the two should be measured.
3. Accident Site Elements
Based on the scale of the photograph and the known distance between the reference points, the remaining accident site element points can be established by measuring the distances on the photograph itself and scaling the result.
Pros
- Very simple method for measuring of complex road path
- No on-site measurements beyond the reference distances
Cons
- Measurement points must be clearly visible
Equipment
Please refer to the main Scene and Road for the Scene Measurements equipment list.
Arrangements
Please refer to the Arrangements section of the Methodology Outline Scene and Road section.